$ sudo usermod -a -G docker $USER
$ sudo service docker restart
로그아웃 후 로그인해서 사용함
$ sudo usermod -a -G docker $USER
$ sudo service docker restart
로그아웃 후 로그인해서 사용함
https://www.digitalocean.com/community/tutorials/how-to-add-swap-space-on-ubuntu-16-04
BlockChain이라함은 블록을 체인으로 엮은 것이 블록체인이다.
이런 불록은 개인과 개인의 거래 (P2P)의 데이터가 기록되는 장부가 되는 것이다.
거래 명세를 담은 블록들이 사슬로 이어져 하나의 장부를 이루게 되는데 이 모든 장부가 네트워크 참여자들에게 공개, 분산하여 관리되기 때문에
"공공 거래장부" 혹은 "분산 거래장부" 라고도 한다.
(그림1)
비트코인은 이러한 개인간의 거래 데이터를 기록하게 되는데, 이런 데이터들을 10분에 한번씩 모아서 거래 내역의 묶음인 블록을 만들어 체인으로 묶는다.
이러한 블록은 네트워크 모든 참여자에게 분배되고 참여자들의 대부분이 타당한 거래라고 승인을 해야 기존의 블록체인에 연결될 수 있다. 한번 연결된 블록체인은
영구히 저장된다.
즉 한번 연결된 구조는 수정이 불가능하게 된다. 이러한 과정이 반복되어 블록체인 형성이 계속되게 된다.
역시 이러한 연결된 사슬구조는 사실상 거래장부의 위,변조를 불가능하게 만든다.
예를들어 100개의 블럭이 현재 진행되고 있고, 참여자들이 101번째 블럭을 체인에 넣기 위한 확인 작업을 수행하고 있다고 가정하면 해커가 50번째 블록을 위조하고자 시도를 했을 때
블럭 50번째 것을 하나만 위조해서는 소용이 없다 다른 참여자들이 모두 블럭에 값을 가지고 있기도 하며 이것을 위조할려면 50번째 이후의 100번부터 50번까지를 모두 위조를
해야한다. 즉 이 위조 작업을 10분이내에 참여자들의 절반이상을 모두 수정하고 101번째 블럭을 위조해야한다.
즉 51개의 블록을 만드는데 소요된 모든 컴퓨팅 비용을 감당해야하는 것인데 이런 작업을 10분이내 끝내야하므로 거래 내역의 조작은 거의 불가능하다고 볼 수 있다.
블록체인 내 정보는 네트워크 참여자 모두에게 공개되는 동시에 보관, 관리되므로 특정 거래정보를 조작할려면 모든 참여자의 컴퓨터를 해킹해 블록체인 전체를 조작해야 하는
비현실적인 작업이 필요하므로 거래의 안정성과 투명성이 보장됩니다.
하지만 비트코인의 단점도 있는데 거래장부의 확장을 예상치 못하여 블록의 용량을 작게 한 것과 이것을 이용해서 할 수 있는 것들이 한계가 있다는 것인데
이것을 블록에 로직까지 넣어서 거래를 로직에 의해 처리하게 되는 스마트컨트랙트를 추가한 것이 이더리움입니다.
하지만 크립토키티즈 때문에 이더리움의 이론적인 부분과 현실적인 부분이 무너지면서 새로운 대안이 필요할 시점이 온 것 같습니다.
rpm -Uvh https://dl.fedoraproject.org/pub/epel/epel-release-latest-7.noarch.rpm rpm -Uvh https://mirror.webtatic.com/yum/el7/webtatic-release.rpm |
yum install php55w php55w-cli php55w-common php55w-gd php55w-ldap php55w-mysql php55w-odbc php55w-pdo php55w-pear php55w-process php55w-xml php55w-xmlrpc
시간 설정
rdate -s time.bora.net
ulimit 설정
* soft nofile 102400
* hard nofile 102400
neptune soft nproc 10240
neptune hard nproc 10240
cat /proc/sys/net/core/rmem_default
cat /proc/sys/net/core/rmem_max
cat /proc/sys/net/core/wmem_default
cat /proc/sys/net/core/wmem_max
cat /proc/sys/net/core/netdev_max_backlog
cat /proc/sys/net/core/optmem_max
cat /proc/sys/net/ipv4/tcp_rmem
cat /proc/sys/net/ipv4/tcp_wmem
sysctl.conf에 수정
net.core.rmem_default = 4194303
net.core.rmem_max = 16777215
net.core.wmem_default = 4194303
net.core.wmem_max = 16777215
net.core.netdev_max_backlog = 100000
net.core.optmem_max = 4194303
net.ipv4.tcp_rmem = 1048576 16777216 33554432
net.ipv4.tcp_wmem = 1048576 16777216 33554432
net.ipv4.tcp_fin_timeout = 10
net.ipv4.ip_local_port_range = 1024 65535
net.ipv4.tcp_tw_recycle= 1
net.ipv4.tcp_tw_reuse= 1
echo "4194303" > /proc/sys/net/core/rmem_default
echo "16777215" > /proc/sys/net/core/rmem_max
echo "4194303" > /proc/sys/net/core/wmem_default
echo "16777215 " > /proc/sys/net/core/wmem_max
echo "100000" > /proc/sys/net/core/netdev_max_backlog
echo "4194303" > /proc/sys/net/core/optmem_max
echo "1048576 16777216 33554432" > /proc/sys/net/ipv4/tcp_rmem
echo "1048576 16777216 33554432" > /proc/sys/net/ipv4/tcp_wmem
TCP TIME_WAIT이 많이 발생하여 문제가 되는 경우
cp_time_wait 은 TCP/IP 프로토콜에서 통신채널을 끊을때 (TCP_FIN) 발생하는 시간으로 연결을 완전히 끊기 전에
클라이언트로 부터 받을 데이터를 못 받게 되는 상황에 대비하여 완전히 끊기 전에 기다리는 시간이다.
만일 시스템에 설정된 양보다 대량의 요청이 발생되게 된다면 WAIT 하는 세션들이 필요이상으로 많아질 것이다.
실제 WAIT 중인 세션들은
# netstat -an | grep TIME_WAIT
명령으로 확인할 수 있다.
그럼 OS의 tcp_time_wait 수치를 확인하려면
# cat /proc/sys/net/ipv4/tcp_fin_timeout
60
시간은 초단위이고 기본값은 60이다. 대량의 요청이 발생한다면 10초 정도로 맞춰주는게 권장값이다.
# echo 10 > /proc/sys/net/ipv4/tcp_fin_timeout
명령으로 현재 파라미터 값을 조정할 수 있다.
재부팅시에도 이 값을 유지하고 싶다면
/etc/rc.local 등에 위 명령을 넣거나
/etc/sysctl.conf 에
net.ipv4.tcp_fin_timeout = 10
라인을 추가해준다.
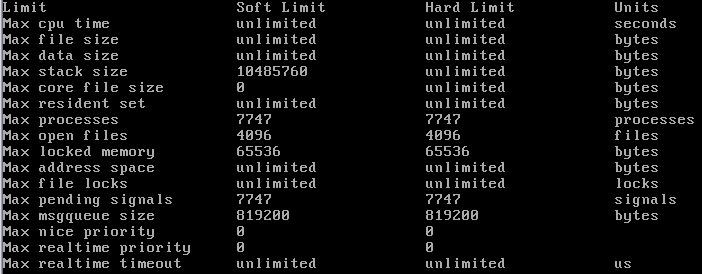
1 | ulimit -Hn |
1 | cat /proc/[Process ID]/limits |
1 | cat /proc/sys/fs/file-max |
1 | vi /etc/security/limits.conf |
1 2 | mario soft nofile 4096mario hard nofile 20480 |
1 | vi /etc/sysctl.conf |
1 | fs.file-max = 200500 |
1 | sysctl -p |
1 | lsof | wc -l |
1 | cat /proc/sys/fs/files-nr |
1) GRANT 명령을 통한 추가 (한방에 추가(명령 한번으로 사용자를 추가))
GRANT ALL PRIVILEGES ON 접근 허용 할 DB 이름.* TO 'new_user_id'@'%' IDENTIFIED BY 'new_user_password' WITH GRANT OPTION;
모든 테이블에 접근 하기위해서는 접근 허용 할 DB 이름.* ==> *.*
'new_user_id'@'%' 에서 '%'의 의미는 신규 계정이 접속할 위치의 제한을 두지 않겠다는 의미.
예) 'new_user_id'@'localhost' localhost 로 접속을 하였을 경우만 허용
'new_user_id'@'127.0.0.1' 127.0.0.1 로 접속 하였을 경우만 허용
'new_user_id'@'192.168.0.100' '192.168.0.100' 에서만 접속 허용.
yum install php-pear
pear channel-discover pear.nrk.io
pear install nrk/Predis
pear channel-discover pear.apache.org/log4php
pear remote-list -c log4php
pear install log4php/Apache_log4php
yum install php php-opcache php-xml php-mcrypt php-gd php-devel php-mysql php-intl php-mbstring php-pear php-pecl php-xmlrpc
완료
| Step 1: Upgrade Packages | |
| # yum update | |
| # yum groupinstall "Development Tools" | |
| Step 2: Installing Recommended Packages | |
| # yum install gcc-c++ patch readline readline-devel zlib zlib-devel | |
| # yum install libyaml-devel libffi-devel openssl-devel make | |
| # yum install bzip2 autoconf automake libtool bison iconv-devel | |
| Step 3: Install RVM ( Ruby Version Manager ) | |
gpg2 --keyserver hkp://keys.gnupg.net --recv-keys 409B6B1796C275462A1703113804BB82D39DC0E3 curl -L get.rvm.io | bash -s stable | |
| Step 4: Setup RVM Environment | |
| source /etc/profile.d/rvm.sh | |
| Step 5: Install Required Ruby Version | |
| # rvm install 1.9.3 | |
| Step 6: Install Another Version ( if Required ) | |
| # rvm install 1.8.6 | |
| Step 7: Setup Default Ruby Version | |
rvm use 1.9.3 --default if centos7.0 rvm install 2.2.4 rvm use 2.2.4 --default | |
| Step 8: Check Current Ruby Version | |
| # ruby --version | |
| Update rubygems | |
| $ gem update --system | |
| $ gem install bundler | |
| #Test ruby and rubygems are working | |
| #Close shell and reopen for changes to take effect | |
| $ruby -v | |
| $gem --version | |
| # Rails | |
| $ yum install sqlite-devel | |
| $ gem install rails | |
| $ gem install sqlite3 |
#!/bin/sh
sync; echo 3 > /proc/sys/vm/drop_caches
crontab -e
0 4 * * * /root/clearcache.sh
100% — FF
99% — FC
98% — FA
97% — F7
96% — F5
95% — F2
94% — F0
93% — ED
92% — EB
91% — E8
90% — E6
89% — E3
88% — E0
87% — DE
86% — DB
85% — D9
84% — D6
83% — D4
82% — D1
81% — CF
80% — CC
79% — C9
78% — C7
77% — C4
76% — C2
75% — BF
74% — BD
73% — BA
72% — B8
71% — B5
70% — B3
69% — B0
68% — AD
67% — AB
66% — A8
65% — A6
64% — A3
63% — A1
62% — 9E
61% — 9C
60% — 99
59% — 96
58% — 94
57% — 91
56% — 8F
55% — 8C
54% — 8A
53% — 87
52% — 85
51% — 82
50% — 80
49% — 7D
48% — 7A
47% — 78
46% — 75
45% — 73
44% — 70
43% — 6E
42% — 6B
41% — 69
40% — 66
39% — 63
38% — 61
37% — 5E
36% — 5C
35% — 59
34% — 57
33% — 54
32% — 52
31% — 4F
30% — 4D
29% — 4A
28% — 47
27% — 45
26% — 42
25% — 40
24% — 3D
23% — 3B
22% — 38
21% — 36
20% — 33
19% — 30
18% — 2E
17% — 2B
16% — 29
15% — 26
14% — 24
13% — 21
12% — 1F
11% — 1C
10% — 1A
9% — 17
8% — 14
7% — 12
6% — 0F
5% — 0D
4% — 0A
3% — 08
2% — 05
1% — 03
0% — 00
01 | package com.softline.study.interceptor; |
02 |
03 | import org.springframework.core.MethodParameter; |
04 | import org.springframework.web.bind.support.WebDataBinderFactory; |
05 | import org.springframework.web.context.request.NativeWebRequest; |
06 | import org.springframework.web.method.support.HandlerMethodArgumentResolver; |
07 | import org.springframework.web.method.support.ModelAndViewContainer; |
08 |
09 | import com.softline.study.model.User; |
10 |
11 | public class UserHandlerMethodArgumentResolver implements HandlerMethodArgumentResolver{ |
12 |
13 | public boolean supportsParameter(MethodParameter parameter) { |
14 | return User.class.isAssignableFrom(parameter.getParameterType()); |
15 | } |
16 |
17 | public Object resolveArgument(MethodParameter parameter, |
18 | ModelAndViewContainer mavContainer, NativeWebRequest webRequest, |
19 | WebDataBinderFactory binderFactory) throws Exception { |
20 | User user = new User(); |
21 | user.setName("테스트"); |
22 | return user; |
23 | } |
24 | } |
01 | package com.softline.study.controller; |
02 |
03 | import org.springframework.stereotype.Controller; |
04 | import org.springframework.web.bind.annotation.RequestMapping; |
05 | import org.springframework.web.bind.annotation.ResponseBody; |
06 |
07 | import com.softline.study.model.User; |
08 |
09 | @Controller |
10 | @RequestMapping("arg") |
11 | public class ArgumentResolverInterceptorTestController { |
12 |
13 | @RequestMapping("resolver") |
14 | @ResponseBody |
15 | public String argumentResolver(User user) { |
16 | return user.getName(); |
17 | } |
18 |
19 | } |
01 | <!--?xml version="1.0" encoding="UTF-8"?--> |
02 | <beans xmlns="http://www.springframework.org/schema/beans"xmlns:xsi="http://www.w3.org/2001/XMLSchema-instance"xmlns:mvc="http://www.springframework.org/schema/mvc"xmlns:context="http://www.springframework.org/schema/context" xsi:schemalocation=" |
03 | http://www.springframework.org/schema/mvchttp://www.springframework.org/schema/mvc/spring-mvc-3.2.xsd |
04 | http://www.springframework.org/schema/beanshttp://www.springframework.org/schema/beans/spring-beans-3.2.xsd |
05 | http://www.springframework.org/schema/contexthttp://www.springframework.org/schema/context/spring-context-3.2.xsd |
06 | "> |
07 |
08 | <!-- mvc 관련 annotation --> |
09 | <mvc:annotation-driven> |
10 | <mvc:argument-resolvers> |
11 | <bean class="com.softline.study.interceptor.UserHandlerMethodArgumentResolver"></bean> |
12 | </mvc:argument-resolvers> |
13 | </mvc:annotation-driven> |
14 |
15 | <!-- default servlet mapping이 필요한 경우 사용 http://toby.epril.com/?p=1107 --> |
16 | <!-- <mvc:default-servlet-handler /> --> |
17 |
18 | <!-- component scan 패키지 등록 stereotype 타입 scan --> |
19 | <context:component-scan base-package="com.softline.study"> |
20 |
21 | |
22 | </context:component-scan></beans> |
출처 : http://code.google.com/p/android4u/wiki/Dialogs
Dialogs
If you want to display a dialog with buttons such as OK,Cancel, you can use an AlertDialog which extends the Dialog class. But the AlertDialog leaves less customization space for you to set the theme, such as a transparent background, customized background picture...(whatever, I could not find the solutions, if you know it, pls tell me, thanks.)
You can not construct an AlertDialog by using the constructor, you should use AlertDialog.Builder class to build your AlertDialog, it is very easy by
AlertDialog.Builder builder = new AlertDialog.Builder();//static inner class
builder.setTitle().setIcon().setMessage();
builder.setPositiveButton().setNegativeButton().setNeutralButton();
builder.setItems().setAdapter().setCursor().setMultiChoiceItems().setSingleChoiceItems();
builder.create();
But I could not find a way to set the theme of an AlertDialog. The theme of an AlertDialog was internally used.
<style name="Theme.Dialog.Alert">
    <item name="windowBackground">@android:color/transparent</item>
    <item name="windowTitleStyle">@android:style/DialogWindowTitle</item>
    <item name="windowIsFloating">true</item>
    <item name="windowContentOverlay">@null</item>
</style>
While, for the public class Dialog, you can use new Dialog(Context ctx, int theme) to specify the theme you want use. The default theme for a Dialog is defined as below:
<style name="Theme.Dialog">
    <item name="android:windowFrame">@null</item>
    <item name="android:windowTitleStyle">@android:style/DialogWindowTitle</item>
    <item name="android:windowBackground">@android:drawable/panel_background</item>
    <item name="android:windowIsFloating">true</item>
    <item name="android:windowContentOverlay">@null</item>
    <item name="android:windowAnimationStyle">@android:style/Animation.Dialog</item>
    <item name="android:windowSoftInputMode">stateUnspecified|adjustPan</item>
</style>
But you can define a theme or style in your $proj/res/values/styles.xml file and apply it to your dialog.
You can also apply the Theme.Dialog to an Activity, then the activity will appear looks like a dialog.
More details about Dialog & AlertDialog, refer the ApiDemos application.
///////////////////////////////////////////////////////////////////////
출처: http://escomic.net/399
기본적으로 android 에서 dialog 를 만들어 띄우면 다음과 같은 모습니다
requestWindowFeature(Window.FEATURE_NO_TITLE);
getWindow().setBackgroundDrawable(new ColorDrawable(Color.TRANSPARENT));
dialog.getWindow().
//////////////////////////////////////////////////////////////////////////////
자신이 만든 xml view 만 보이게 하기
View popupView = View.inflate(act, R.layout.cchatpopup, null);
AlertDialog _ab = new AlertDialog.Builder(act)
.show();
_ab.getWindow().setBackgroundDrawable(new ColorDrawable(0x0000ff00));
_ab.setContentView(popupView);
/////////////////////////////////////////////////////////////////////////////////////////////////////////////////////////////////////////////////////////////////////////
//AlertDialog 뒷 투명검은 배경에 투명값 넣기
AlertDialog _ab = new AlertDialog.Builder(ba)
.setMessage("test");
//뒷 검은배경을 알파값을 넣어줄수 있다.
private void setDimBehindAlpha(float alpha)
{
if(_ab == null)
return;
_ab.getWindow().clearFlags(WindowManager.LayoutParams.FLAG_DIM_BEHIND);
WindowManager.LayoutParams lp = _ab.getWindow().getAttributes();
lp.dimAmount= alpha;
_ab.getWindow().setAttributes(lp);
_ab.getWindow().addFlags(WindowManager.LayoutParams.FLAG_DIM_BEHIND);
}
///////////////////////////////////////////////////////////////////////////////////////////////////////////////////////////////////////////////////////////////////
출처: http://arabiannight.tistory.com/360
Dialog의 각종 속성들 정리 입니다.
1) Back키 눌렀을 경우 Dialog Cancle 여부 설정
|
2) Dialog 호출시 배경화면이 검정색으로 바뀌는 것 막기 !
|
3) Dialog 밖을 터치 했을 경우 Dialog 사라지게 하기
| mDialog.setCanceledOnTouchOutside(true); |
4) Dialog 밖의 View를 터치할 수 있게 하기 (다른 View를 터치시 Dialog Dismiss)
WindowManager.LayoutParams.FLAG_NOT_TOUCH_MODAL); |
5) Dialog 자체 배경을 투명하게 하기
(new ColorDrawable(android.graphics.Color.TRANSPARENT)); |
6) Dialog Cancle시 Event 받기
|
7) Dialog Show시 Event 받기
|
8) Dialog Dismiss시 Event 받기
|
/////////////////////////////////////////////////////////////////////////////////////////////////////////////////////////////////////////////////////////////////////
출처: http://www.masterqna.com/android/8142/%EC%BB%A4%EC%8A%A4%ED%85%80-alertdialog-%ED%88%AC%EB%AA%85%ED%95%98%EA%B2%8C-%EB%A7%8C%EB%93%9C%EB%8A%94-%EB%B2%95
다이얼러그.getWindow().setBackgroundDrawable(new ColorDrawable(android.graphics.Color.TRANSPARENT));
이소스를 추가하시면 됩니다.
CustomDialog를 사용하시다면 onCreate()에서
getWindow().setBackgroundDrawable(new ColorDrawable(android.graphics.Color.TRANSPARENT));

개발자

1.protectedvoidonApplyThemeResource(Resources.Theme theme,intresid,booleanfirst) {2.super.onApplyThemeResource(theme, resid, first);3.// no background panel is shown4.theme.applyStyle(style.Theme_Panel,true);5.6.}